

How to use phonegap-plugins?
Hi all, in this tutorial I'll show you how to use android phonegap plugins with eclipse.
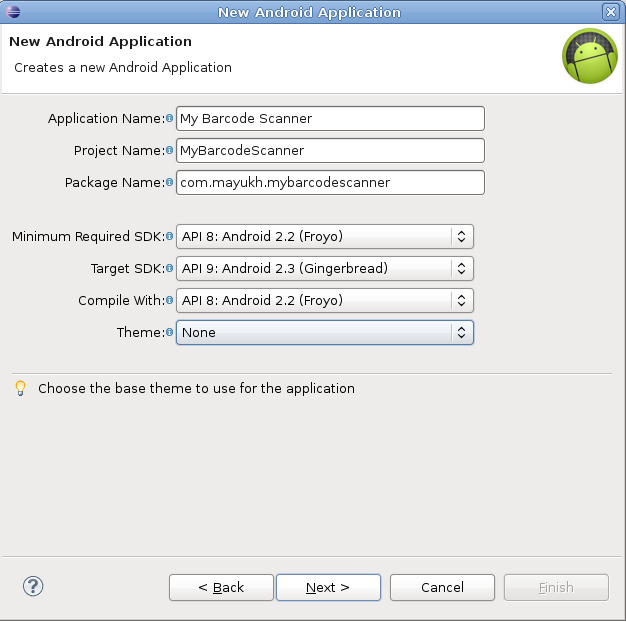
First create an android project using eclipse and phonegap. If you are unable to do this please go through Hello World! with PhoneGap, Android and Eclipse tutorial.
Here I have created a project called 'MyBarcodeScanner'.

So to use phonegap-plugins first you have to download it. Go to the following link given below and download the zip.
https://github.com/phonegap/phonegap-plugins
Now extract the phonegap-plugins-master.zip folder and open the it, go to the android directory, here you will find all the plugings which you can use in your application. For this application I have used BarcodeScanner plugin, so go to BarcodeScanner directory and the version I have used is 2.2.0 as I am using Cordova 2.7.0 (If you are using Cordova 2.2.0 or greater please use the 2.2.0 directory).
Now I will slow you how to add phonegap plugin to your project. 1. First you have to add a 'LibraryProject' into Eclipse. So go to File -> New -> Project -> Android -> Android Projects From Existing Code -> Next.
2. Now you have to browse the LibraryProject's location (i.e. /phonegap-plugins-master/Android-Sw/phonegap-plugins-master/Android/BarcodeScanner/2.2.0/LibraryProject). also I have checked copy projects into workspace.
3. Now right click on MyBarcodeScanner project go to properties. In the Android section under Library click the Add button and select the library i.e. CaptureActivity.

4. To use the plugin, move barcodescanner.js (/phonegap-plugins-master/Android/BarcodeScanner/2.2.0/assets/barcodescanner.js) to your project's www folder and include a reference to it in your html files.
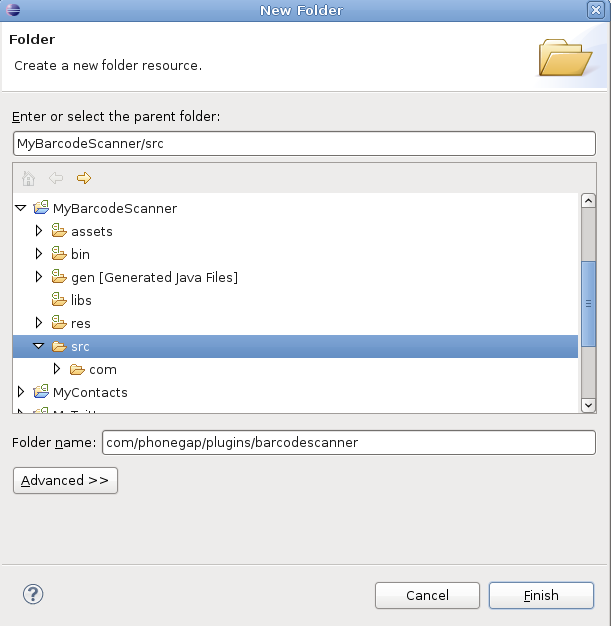
5. Create a folder called 'com/phonegap/plugins/barcodescanner' within your project's src folder i.e. MyBarcodeScanner/src.
6. And copy the BarcodeScanner.java(/phonegap-plugins-master/Android/BarcodeScanner/2.2.0/src/com/phonegap/plugins/BarcodeScanner.java) file into that new folder (MyBarcodeScanner/src/com/phonegap/plugins/barcodescanner/BarcodeScanner.java).

7. In your MyBarcodeScanner/res/xml/config.xml file add the following lines inside the tag.
8. Add the following activity to your AndroidManifest.xml file. It should be added inside the tag.
9. Also you need to add the following permission in your AndroidManifest.xml file.
Now create a file called index.html into yor www folder and add the following code inside it.
Now run the android project and you will get the following output given below.


 How to use phonegap-plugins?
 Hi all, in this tutorial I'll show you how to use android phonegap plugins with eclipse.
First create an android project using eclipse and phonegap. If you are unable to do this please go through Hello World! with PhoneGap, Android and Eclipse tutorial.
Here I have created a project called 'MyBarcodeScanner'.
So to use phonegap-plugins first you have to download it. Go to the following link given below and download the zip.
https://github.com/phonegap/phonegap-plugins
Now extract the phonegap-plugins-master.zip folder and open the it, go to the android directory, here you will find all the plugings which you can use in your application. For this application I have used BarcodeScanner plugin, so go to BarcodeScanner directory and the version I have used is 2.2.0 as I am using Cordova 2.7.0 (If you are using Cordova 2.2.0 or greater please use the 2.2.0 directory).
Now I will slow you how to add phonegap plugin to your project. 1. First you have to add a 'LibraryProject' into Eclipse. So go to File -> New -> Project -> Android -> Android Projects From Existing Code -> Next.
2. Now you have to browse the LibraryProject's location (i.e. /phonegap-plugins-master/Android-Sw/phonegap-plugins-master/Android/BarcodeScanner/2.2.0/LibraryProject). also I have checked copy projects into workspace.

3. Now right click on MyBarcodeScanner project go to properties. In the Android section under Library click the Add button and select the library i.e. CaptureActivity.
4. To use the plugin, move barcodescanner.js (/phonegap-plugins-master/Android/BarcodeScanner/2.2.0/assets/barcodescanner.js) to your project's www folder and include a reference to it in your html files.
5. Create a folder called 'com/phonegap/plugins/barcodescanner' within your project's src folder i.e. MyBarcodeScanner/src.
6. And copy the BarcodeScanner.java(/phonegap-plugins-master/Android/BarcodeScanner/2.2.0/src/com/phonegap/plugins/BarcodeScanner.java) file into that new folder (MyBarcodeScanner/src/com/phonegap/plugins/barcodescanner/BarcodeScanner.java).
7. In your MyBarcodeScanner/res/xml/config.xml file add the following lines inside the
8. Add the following activity to your AndroidManifest.xml file. It should be added inside the
9. Also you need to add the following permission in your AndroidManifest.xml file.
Now create a file called index.html into yor www folder and add the following code inside it.
Now run the android project and you will get the following output given below.


No comments:
Post a Comment